Quantcast
Channel: vise – Hackaday

A Geared Bench Vise To Clamp All The Things

$
0
0

On the eternal quest of workshop upgrades, [Alexandre Chappel] has combined woodworking and 3D printing to add a versatile 0.5 m wide vise with some clever internals to his workbench.

The challenge with such a wide vise is that it requires two timed lead screws on either end of the vise to prevent if from pulling skew under force. This can be done with a chain, belt, or [Alexandre]’s choice, gears. Inside the moving part of the vise he fitted series of 5 herringbone gears. By turning the center gear with a lever, it rotates the gears on the end which are fixed to tow lead screws. The external surfaces of the clamp are made with plywood, and the gears are printed with PLA and high infill percentage. [Alexandre] does say that he is not sure durable the gears are, but they definitely aren’t flimsy. He added an acrylic inspection window to the box section, which we think looks superb with the colored gears peaking through. The back of the vise is mounted inside the workbench, which keeps the look clean and doesn’t take up any bench space.

[Alexandre] does a lot of filming in his workshop, so recently he also built a very impressive and practical camera arm to avoid having to move tripods the whole time. A vise is a must-have tool in almost any workshop, so we’ve seen a few DIY versions, like magnetic base vise and one with a hydraulic vise.

Giant Blacksmith Vise From Start To Finish

$
0
0

In any proper workshop you want to be able to securely hold a workpiece, whether it’s a tiny PCB or a heavy piece of forged steel. [Jason Marburger] from Fireball Tool needed a really large heavy-duty vise, so he built himself a massive 1490 lbs / 676 kg floor-standing blacksmith vise from scratch.

Blacksmith vises are designed to take a lot of heavy abuse, such as holding heavy pieces of steel that are being hammered. [Jason]’s vise stands about 3 feet tall, and the main frame components were cut from 1 5/8 inch (41.3 mm) steel with a water jet cutter. The jaws are operated with a large hand wheel connected to a lead screw. Bearings on the lead screw allow the hand wheel to be spun like a flywheel, allowing it to be quickly opened and closed. The weight of the moving jaw keeps the lead screw under tension, eliminating any backlash. This allows for really fine control over the holding force, which [Jason] demonstrates by carefully clamping a tiny screw. With the hand wheel alone the vise can exert 12880 lb / 5800 kg, but a hydraulic lift was also added, boosting the force to 30000 lbs. The deep throat allows a large object to be clamped, and the jaws can also be offset to clamp something to the side of the vise.

The vise was beautifully finished with powder coating and pin striping, which will no doubt wear over time if it’s properly used, but the vise itself should last a few lifetimes. While this isn’t something you can really build in a home workshop, it is always inspiring to see what is possible with a bit more tools, knowledge and skill. The build is documented in a 4 part series (link in first paragraph), but we’ve added a short highlights reel below for your viewing pleasure.

[Jason] really knows his way around a piece of steel, and we’ve previously covered his techniques for cleaning up the inside to square tubing to make telescoping tubes. Another interesting recent vise build was [Alexandre Chappel]’s wide bench vise that used 3D printed gears to drive two lead screws simultaneously.

A Hydraulic Bench Vise, Made On The Bench

$
0
0

When we sit down to a build video and see that it’s from [Workshop From Scratch], we know it’ll be a good one, full of plenty of gratuitous metal-wrangling with the promise of an ingenious and useful take on a workshop essential at the end. The home made hydraulic bench vise is the latest from that particular workshop, so settle down with the video below the break for a treat.

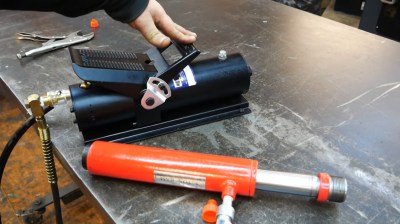
Unlike the lead screw we’d expect from a more conventional vise, this one uses a hydraulic pull cylinder and its associated compressor which is powered by compressed air. A substantial vise frame is constructed around the cylinder from thick steel plate, with some careful welding and grinding to ensure a smooth finish.  The result is substantial clamping force with a very smooth and quick action, which doesn’t overhang the edge of the bench in the way a more traditional one does. The hydraulic tube is tucked away through a hole in the bench, and the foot-operated pump lies out of sight on the floor.

Looking at this vise with blacksmith-trained eyes, it raises the question of how it might perform were something in it to be hammered. Overhanging vises are vulnerable to splitting when hammered, so there’s the possibility that this one with its flat mounting might fare a little better. Either way it would be an asset to any workshop.

When it comes to vises, [Workshop From Scratch] is where we saw that magnetic vise earlier last year.

Credit for Clever Corner Clamp

$
0
0

We love this design’s simplicity, but its mundane appearance is deceptive because a lot is going on here. [Bas van Hassel]’s clamp looks like a bench cookie or maybe a compressed hockey puck, but one pie piece-shaped quadrant extends on dovetails to form a right-angle channel, perfect for holding your ninety-degree joint while your glue dries. Opposing disc edges are flat, so your clamp won’t slip. Divots on the top and bumps on the bottom keep your stacks nice and neat when you put them away. All around, we have no trouble believing this designer has spent a lot of hours in the woodshop.

As long as your wood pieces are the same thickness, it seems like a practical use of printer filament, but if you have different sizes, you can always pull the dovetail out of its groove. Thanks to the scaling feature built into slicing programs, we expect some precision makers to utilize this in projects like dollhouses and model airplanes. If you have a high-resolution printer, you could make some miniature tools to construct a flea circus set. At that point, you may need to make some smaller clamps.

Print orientation for the puck is straightforward as it is a print-in-place design, but sometimes it isn’t always clear, so listen to those who know better and don’t be afraid of gears in your vises.


Old School Fastener Tutorial Is Riveting

$
0
0
Robert Murray Smith Discusses Rivets and Riveting

Whether you’re making, repairing, or hacking something together, we all need fastners. Screws, nuts and bolts, and pop rivets are handy sometimes. Various resins and even hot glue are equally useful. In some cases however the right fastener for the job eludes us, and we need another trick up our sleeve.

[Robert Murray Smith] found himself in such a position. His goal was to join two pieces of aluminum that need a nice finish on both sides. Neither glue, pop rivets, screws, nuts or bolts would have been appropriate.  [Robert] is always flush with ideas both new and old, and he resorted to using an old school fastener as explained as explained in his video “How To Make And Use Rivets“.

In the video below the break, [Robert] goes into great detail about making a simple rivet die from a 5mm (3/16”) piece of flat steel, creating the rivet from a brass rod, and then using the flush rivet to join two pieces of aluminum. The simple tooling he uses makes the technique available to anybody with a propane torch, a vise, some basic tools, and a simple claw hammer. We also appreciate [Robert]’s discussion of cold riveting, hot riveting, and annealing the rivets as needed.

Not only is riveting a technique thousands of years old, its advancement and application during the Industrial Revolution enabled technologies that couldn’t have existed otherwise. Hackaday’s own [Jenny List] did a wonderful write up about rivets in 2018 that you won’t want to miss!

Vise Tripod Lets You Put The Tool Where You Need It

$
0
0

Vises are useful things for holding whatever you’re working on, but too often they’re stuck to a bench. [seamster] has experienced the glory of having a more portable solution, however, and has shared his design for a heavy duty vise tripod that provides just that.

The trick is that to be useful, the design must be heavy and stout enough to hold the vise without tipping over. For this build, [seamster] selected a fat steel pipe with 1/4″ thick walls, some solid bars and some 3/8″ thick plate. Legs and arms where then fabbed up from the bar material and welded up to form the tripod. A stout plate for the vise was then welded on top of the pipe, and the vise mounted pride of place on top.

It’s not a particularly difficult build, but it’s a smart idea that gets you a vise you can easily drag to where it’s needed. If you don’t have the vise itself, consider this hydraulic build. Meanwhile, if you’ve been whipping up your own useful workshop hacks, let us know!

Drill Press Piece Fastening 101

$
0
0
An unfastened piece of pipe in a drill press, rotating away

What are the options you have for securing your workpiece to the drill press table? [Rex Krueger] shows us that there’s plenty, and you ought to know about them. He goes through the disadvantages of the usual C-clamps, and shows options like the regular drill press vice and a heavy-duty version that even provides a workpiece tilting mechanism, and points out small niceties like the V-grooves on the clamps helping work with round stock. For larger pieces, he recommends an underappreciated option — woodworkers’ wooden handscrew clamps, which pair surprisingly well with a drill press. Then, he talks about the hold-down drill press clamps, a favourite of his, especially when it comes to flat sheets of stock like sheet metal or plastic.

As a bonus for those of us dealing with round stock, he shows a V-block he’s made for drilling into its side, and round stock clamp, made by carefully drilling a pair of wooden hand screw clamps, for when you need to drill into a dowel from its top. The ten-minute video is a must watch for anyone not up to speed on their drill press piece fastening knowledge, and helps you improve your drilling game without having skin in it.

We’ve covered a few ingenious and unconventional drill piece fastening options before, from this wise held down by repurposed bicycle quick-release parts, to an electromagnetic wise that left our readers with mixed opinions.


Latest Images